一、简介
公司是做会议平板的,最近产品提出需求,要求在白板上增加打印功能,能够连接公司的打印机,将白板上的内容打印出来,一开始疯狂的找看看网上有没有案例,这方面的案例是少之又少,大多是蓝牙连接打印机,要不就是连接的是pos机去进行打印,而且Demo都是7、8年前的,经历过各种踩坑终于是将这个功能实现了
二、思路
因为公司是有系统源码的,然后发现aosp系统中提供了打印服务这个功能,于是乎就从这里去入手,但是打开会议机的设置一看,没有这个服务,点击原生设置里的打印,页面立马崩溃了,这时候猜想可能是主板厂商把这个功能模块给阉割掉了,于是乎,需要在源码里面把这个模块给加进来
三、添加打印模块(已有可忽略)
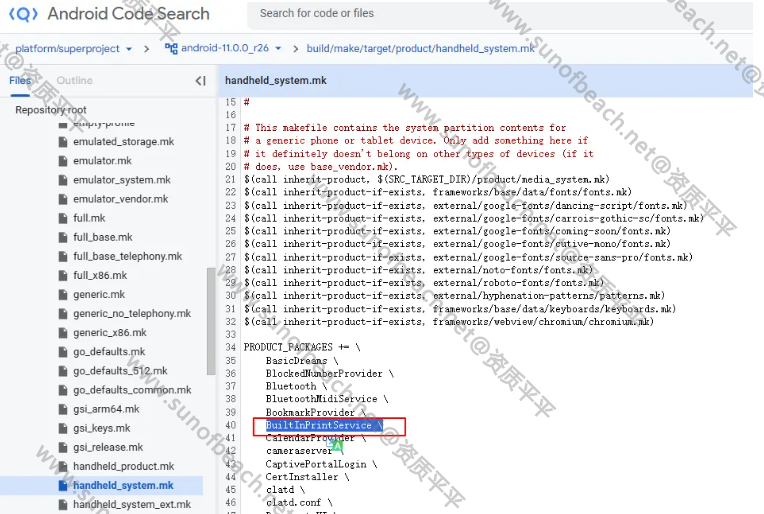
源码文件路径为:build/make/target/product/handheld_system.mk
查看有没有BuiltInPrintService,没有加上即可
PS:这只是针对aosp的源码,各家主板厂商可能做了修改,核心思路是找到模块添加的地方,把BuiltInPrintService服务添加进去。
问题:
把模块添加进去后,点开打印,还是崩溃的话,解决办法如下:
system/etc/permissions/tv_core_hardware.xml中的tv_core_hardware.xml用adb pull出来,在最后面添加一句<feature name="android.software.print" />,然后用adb push进去
四、打印相关系统app
与打印有关的系统app一共有两个:一个是PrintSpooler另一个是BuiltInPrintService
路径分别是:
frameworks/base/packages/PrintSpooler/
packages/services/BuiltInPrintService/
PrintSpooler:
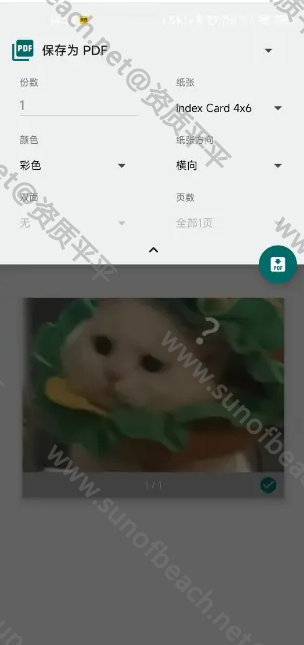
这个app用来选择打印参数设置比如:颜色、纸张大小、份数等以及预览即将打印的画面,同时提供了寻找跟连接打印机的入口
BuiltInPrintService:
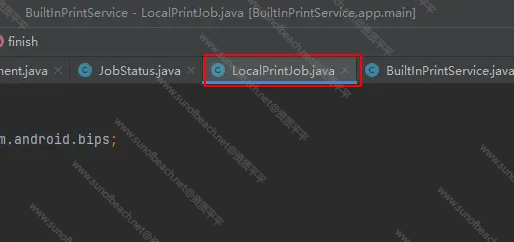
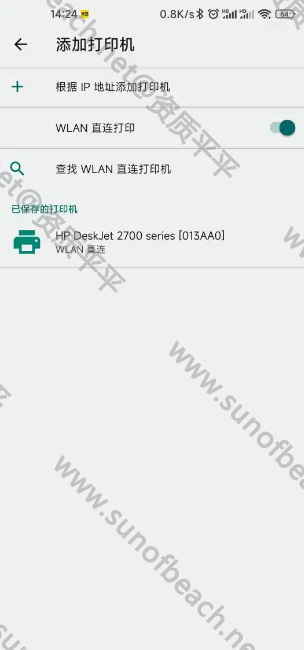
这个app是个提供了连接打印机的方式:包括了IP地址连接跟WLAN直连,连接后之后,在PrintSpooler界面就能看见已经连接好的打印机了,这里也提供了打印机的状态:包括打印开始、打印中、打印错误、打印取消以及打印完成,需要提醒的可以在LocalPrintJob类里面添加
五、更改UI及应用调试
产品提了需求,要更改打印的UI,并删减一些功能,这些是系统app,如果需要方便调试的话需要把应用给独立出来,在AndroidStudio上跑通
-
我们需要先把模块添加进去,再在系统里面编译一遍,这样就会生成有我们需要的lib库,然后把lib库放到项目中去
-
应用还依赖framework,还需要把framework.jar包导入进去
-
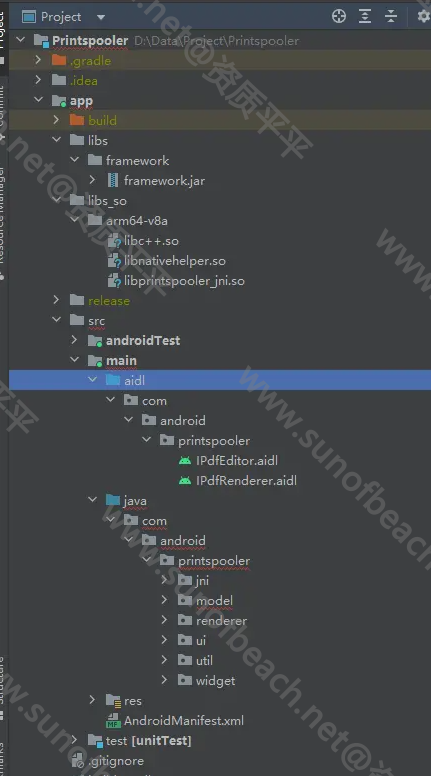
把项目代码挪过去(爆红是正常的),注意包名要一致,下面是PrintSpooler的项目架构
4.在build.gradle配置一下
plugins {
    id 'com.android.application'
}

android {
    namespace 'com.android.printspooler'
    compileSdk 30

    defaultConfig {
        applicationId "com.android.printspooler"
        minSdk 26
        targetSdk 30
        versionCode 1
        versionName "1.0"

        testInstrumentationRunner "androidx.test.runner.AndroidJUnitRunner"
    }

    //注意1:添加了framework.jar后,需要添加以下代码
    gradle.projectsEvaluated {
        tasks.withType(JavaCompile) {
            Set<File> fileSet = options.bootstrapClasspath.getFiles()
            List<File> newFileList = new ArrayList<>();
            //JAVA语法,可连续调用,输入参数建议为相对路径
            newFileList.add(new File("libs/framework/framework.jar"))
            //最后将原始参数添加
            newFileList.addAll(fileSet)
            options.bootstrapClasspath = files(
                    newFileList.toArray()
            )
        }
    }

    //注意2:需要关闭检查,不然AndroidStudio会一直卡在Building
    lintOptions {
        checkReleaseBuilds false
    }

    ...

    sourceSets{
        main{
            jniLibs.srcDirs = ['./libs_so']
        }
    }
}

//代码比较老,所以要用v4 v7包
dependencies {
    implementation 'com.android.support:support-v4:26.0.0'
    implementation 'com.android.support:appcompat-v7:26.0.0'
    implementation 'com.android.support:recyclerview-v7:26.0.0'
    compileOnly files('libs/framework/framework.jar')
    testImplementation 'junit:junit:4.13.2'
}
然后就可以Android Studio调试了,但是调试应用的时候如果我直接Debug运行,有时会看不到效果,必须打成apk,然后用adb命令安装进去
安装之前得先用adb把system/app目录下的PrintSpooler给删掉,然后重启,不然签名不对,装不上
六、调用打印机
应用都调试好了,我们该怎么使用呢?
一、打印Bitmap
//利用PrintHelper
 private void doPhotoPrint() {
        PrintHelper photoPrinter = new PrintHelper(getActivity());
        photoPrinter.setScaleMode(PrintHelper.SCALE_MODE_FIT);
        Bitmap bitmap = BitmapFactory.decodeResource(getResources(),
                R.drawable.droids);
        photoPrinter.printBitmap("droids.jpg - test print", bitmap);
    }
二、打印图片文件
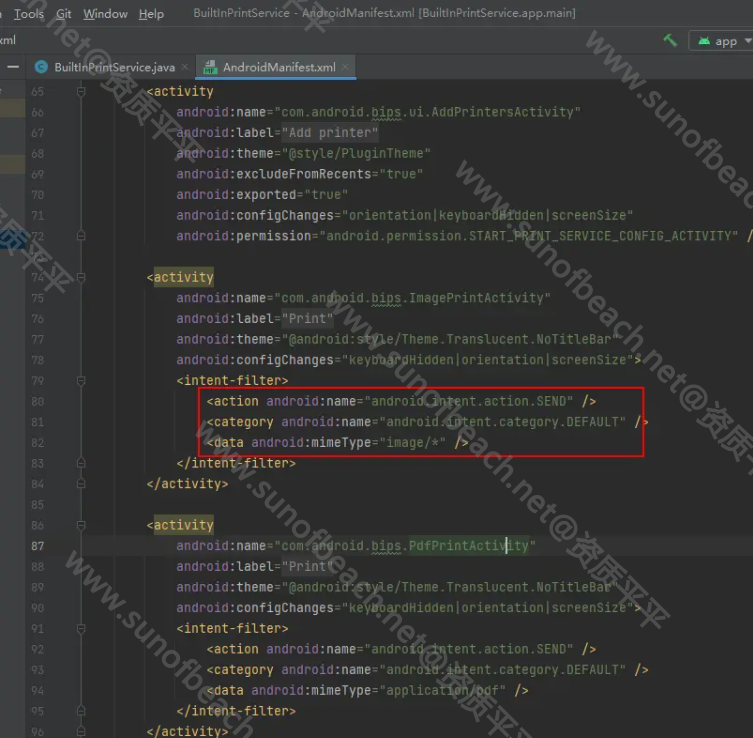
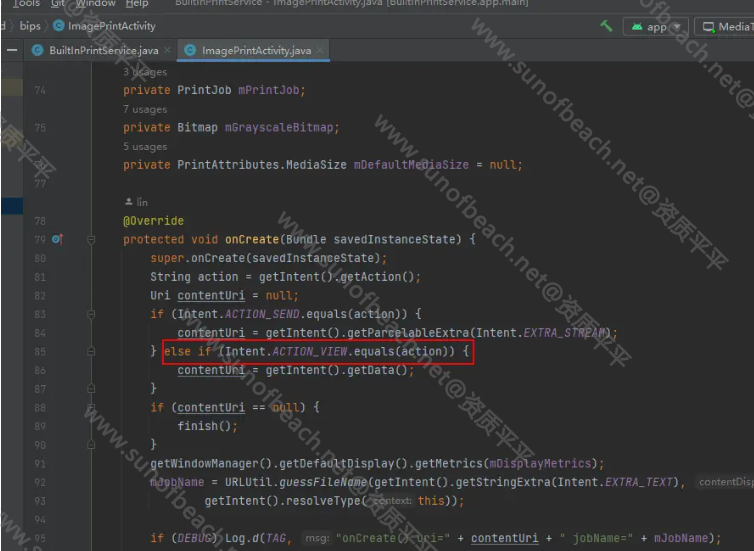
//通过传uri的方式去穿,但BuildInPrintService代码里面是支持ACTION_VIEW,但AndroidManifest.xml只定义了ACTION_SEND
Uri uri = FileProvider.getUriForFile(context, context.getPackageName() + ".fileprovider", file);
Intent intent = new Intent(Intent.ACTION_VIEW);
intent.setDataAndType(uri, "image/*");
intent.addFlags(Intent.FLAG_GRANT_READ_URI_PERMISSION);
context.startActivity(intent);
三、打印PDF文件
方法也是跟打印图片一样
四、打印自定义文档
我的需求是:将多个白板界面传入到打印,然后能选择打印
发现PrintHelper只能发送一张Bitmap,不能发送多张,但可以曲线救国,把多张Bitmap保存成一个PDF文件,然后发送给打印服务,这时候就需要我们实现打印自定义文档了
1.编写PdfAdapter继承自PrintDocumentAdapter,并重写相关方法
public class PdfAdapter extends PrintDocumentAdapter {
    private static final String TAG = "PdfAdapter";
    private final File file;
    private String mJobName;

    private CancellationSignal mCancellationSignal;


    public PdfAdapter(File file) {
        mJobName = "WhiteBoardJob";
        this.file = file;
    }

    @Override
    public void onLayout(PrintAttributes oldAttributes, PrintAttributes newAttributes, CancellationSignal cancellationSignal, LayoutResultCallback callback, Bundle extras) {
        Log.d(TAG, "onLayout(): ");
        PrintDocumentInfo info = new PrintDocumentInfo.Builder(mJobName)
                .setContentType(PrintDocumentInfo.CONTENT_TYPE_DOCUMENT)
                .setPageCount(PrintDocumentInfo.PAGE_COUNT_UNKNOWN)
                .build();
        callback.onLayoutFinished(info, false);
    }

    @Override
    public void onWrite(PageRange[] pages, ParcelFileDescriptor destination, CancellationSignal cancellationSignal, WriteResultCallback callback) {
         Log.d(TAG, "onWrite()");
        mCancellationSignal = cancellationSignal;
//        new PdfDeliverTask(destination, callback).execute();
        try (InputStream in = new FileInputStream(file)) {
            if (in == null) {
                throw new IOException("Failed to open input stream");
            }
            try (OutputStream out = new FileOutputStream(destination.getFileDescriptor())) {
                byte[] buffer = new byte[10 * 1024];
                int length;
                while ((length = in.read(buffer)) >= 0 && !mCancellationSignal.isCanceled()) {
                    out.write(buffer, 0, length);
                }
            }
            if (mCancellationSignal.isCanceled()) {
                callback.onWriteCancelled();
            } else {
                callback.onWriteFinished(new PageRange[] { PageRange.ALL_PAGES });
            }
        } catch (IOException e) {
            Log.w(TAG, "Failed to deliver content", e);
            callback.onWriteFailed(e.getMessage());
        }
    }

    @Override
    public void onFinish() {
        super.onFinish();
        Log.d(TAG, "onFinish(): ");
    }
}
2.然后把pdf文件传给打印服务
//生成PDF文件
File bitmapForPdf = saveBitmapForPdf(bitmapList, dir, name);

//PDF文件生成之后,需要创建打印任务,将PDF传进去,直接调用activity将不会启动打印服务!!!!
//注意:请确保context为Activity的context,不然启动不了!!
PrintManager printManager = (PrintManager) context.getSystemService(Context.PRINT_SERVICE);
if (printManager == null) {
    return;
}

PrintAttributes printAttributes = new PrintAttributes.Builder()
        .setColorMode(PrintAttributes.COLOR_MODE_COLOR)
        .setMediaSize(new PrintAttributes.MediaSize("WhiteboardId","whiteboardPrintLabel",3840,2160)) //设置尺寸以确定横竖屏
        .build();
printManager.print("WhiteBoardJob", new PdfAdapter(bitmapForPdf), printAttributes);
七、踩得坑
-
PDF文件没有黑白模式,或者选择黑白模式对PDF文件无效,说是有些打印机不支持黑白模式,然后Android直接默认PDF没有黑白模式
-
WLAN直连搜索设备的时候,需要将WIFI热点关掉,不然搜索不出设备(太坑了,Android没有提示,而公司产品热点是默认打开的),另外需要打印机支持WLAN直连功能才能出现在搜索列表中
-
图片文件只能单张打印,PDF可以多张选择打印某几张


